iPads are designed to be simple to use. However, the initial iPad set up process isn't always the most straightforward.
You’ll need what’s called an Apple ID or iCloud account. But if you don’t have one, don’t worry. You can create one as part of this process, and we'll show you how.
iPad setup summary
Setting up an iPad isn't overly complex, but there are a lot of steps to follow. Apple does make this easy with its on-screen instructions, but our guide will ensure your fully covered.
Esimated time: 30 minutes
Difficulty: Low
If you already own an iPhone or an older iPad, you can miss out a bunch of steps too. We’re splitting this guide into three parts.
- If this is your first ever iPad, go ahead and start from the beginning.
- If you already have an iCloud account/Apple ID from another Apple device, you want section two for setting up a your iPad.
- And if you still have your old iPad to hand, congrats, you get the easiest ride and can skip right to section 3.
Let’s get started.
First time iPad owner
How to set up a new iPad for the first time
Step 1: Turn on your iPad and swipe up
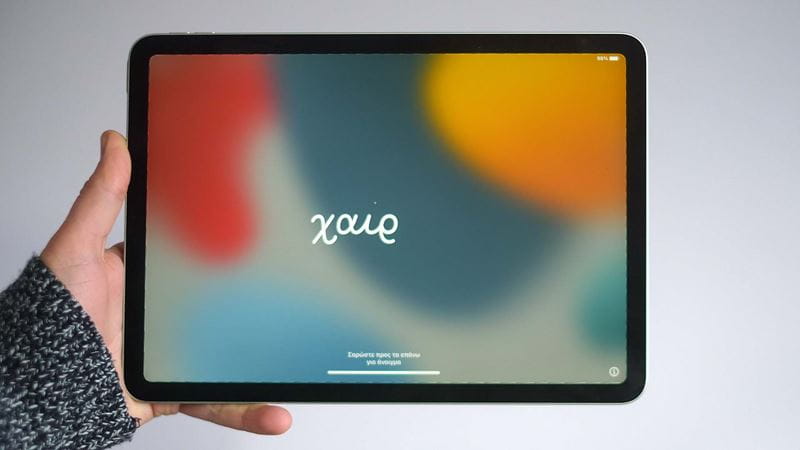
The first thing you’ll see when you first turn on a new iPad is a welcome screen that cycles through a few different languages, saying “hello”. Just swipe up from the very bottom of the screen. It does not matter if another language is on-screen when you do.
Step 2: Language and location
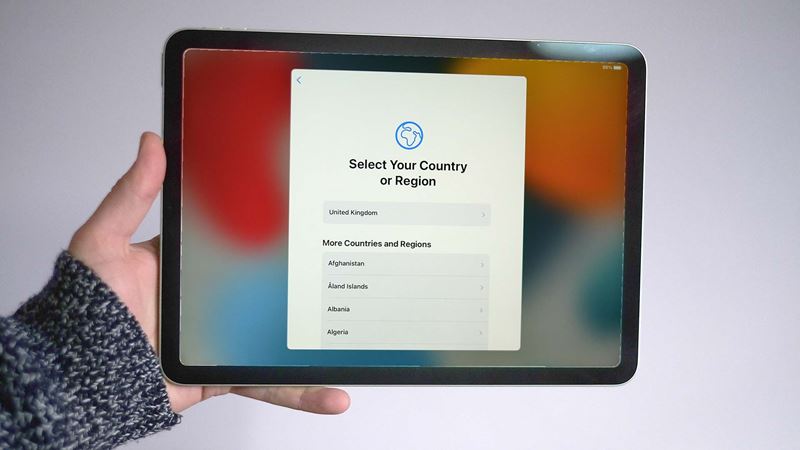
This swipe takes you to the actual language selection page, which comes in two parts. You first select your language, while the next screen lets you select your “country or region”. This affects things like the default currency you’ll see on the tablet, and how dates are presented.
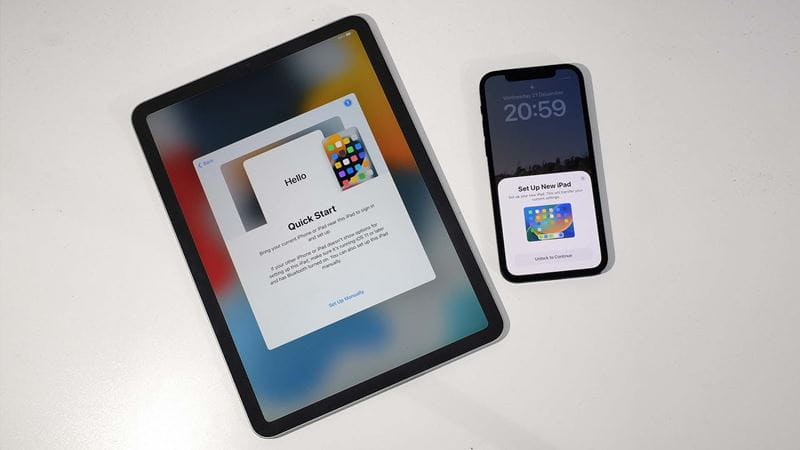
Step 3: Tap 'Set Up Manually'
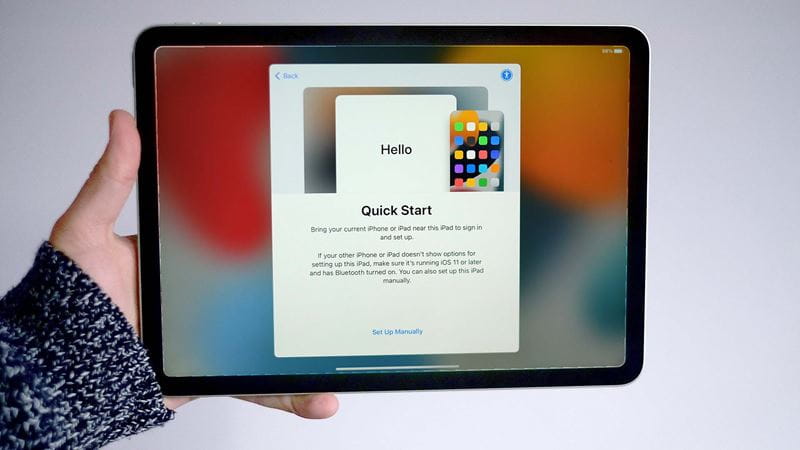
The next page is Quick Start. This is here largely for folks who already have an iPad, and can use that to speed-up setup. But we don’t so tap the Set Up Manually link towards the bottom of the page.
Step 4: Connect your iPad to the internet
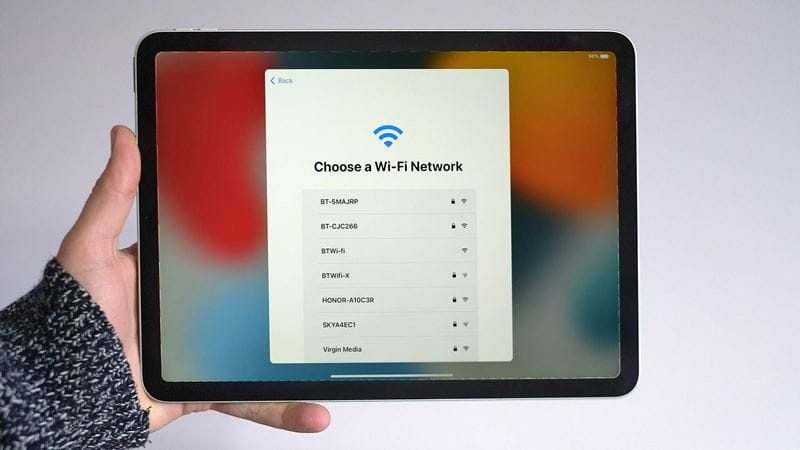
Step 5: No internet?
No access to your home internet? If you scroll down to the bottom of this wi-fi login page you will see a Connect to Mac or PC button. This uses Apple account credentials already stored on your computer to setup your iPad. Unlike Android tablets, there is no way to use an iPad without an account that you log into.
Step 6: Apple's Privacy Policy
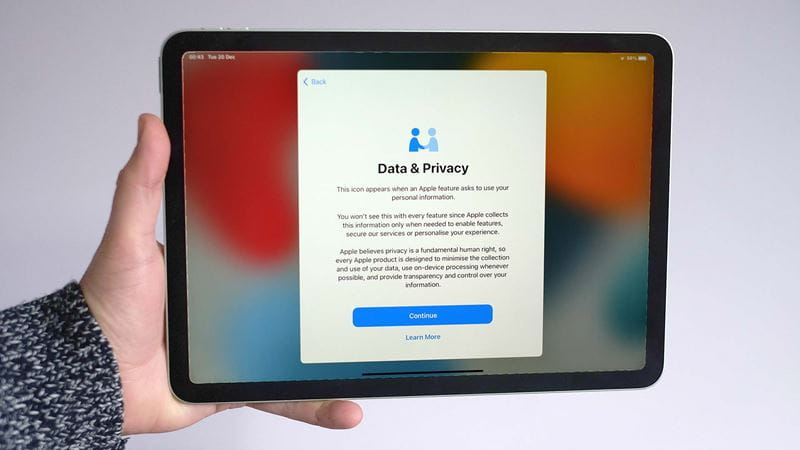
Managed to get your iPad connected to the internet? You’ll now be shown Apple’s Privacy Policy, which you need to agree to in order to head to the next step.
Step 7: Set up Touch ID
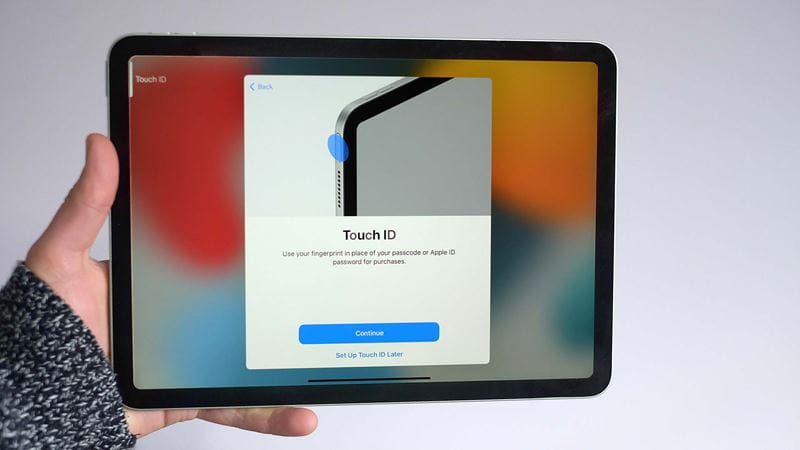
This next part will change a little between different iPad models. We used an iPad Air for this demo, and it has a top-mounted fingerprint scanner.
We were asked to place a finger or thumb on the pad so the iPad could “learn” our fingerprint.
It’s a good idea to think about which digit naturally heads to that pad first, and use that one. However, you can add additional fingers later on in the iPad’s Settings menu.
Step 8: Second security layer
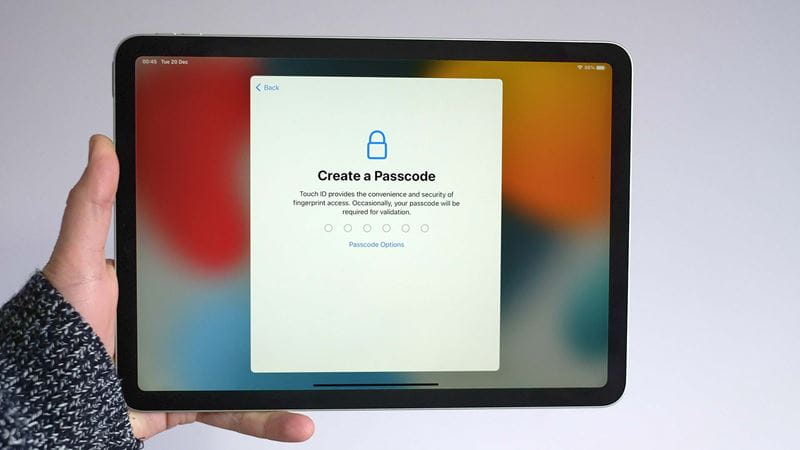
Avoid super-common pin codes such as “0000”, “1234”, “1111” or “5678”, particularly if you are likely to take your iPad out of the home. The iPad will let you know if it thinks your pin is too easy to guess.
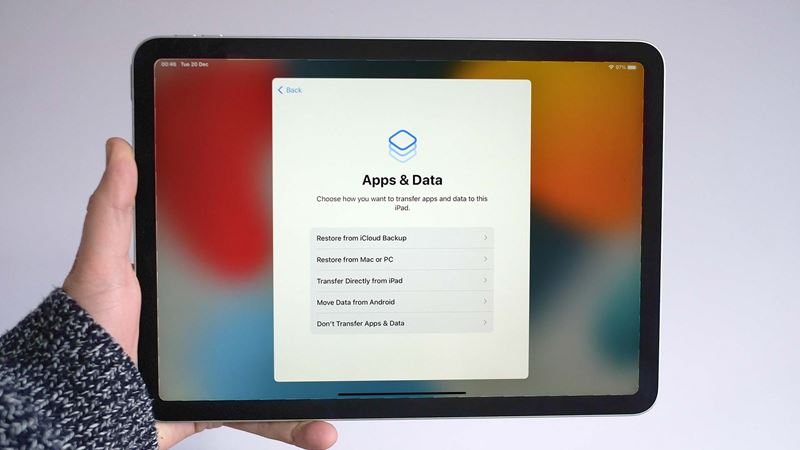
Step 9: To transfer, or not to transfer?
Step 10: Apple ID
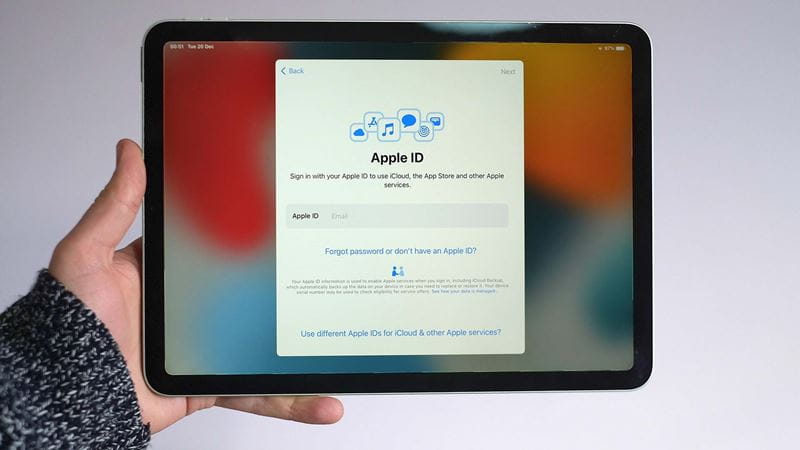
This part is important: we need to login to an Apple ID. This is the login you use to access, for example, Apple App Store apps and — sorry folks — it’s necessary if you want to use an iPad.
You won’t have one of these if you have never owned an Apple product before. If that's the case, follow these steps to set up your Apple ID;
- Tap “Forgot Password or Don’t Have An Apple ID”
- Fill in your name and date of birth
- Next, choose an email address to link to your Apple ID. This is much like when you create a login for an online retailer or other service — an old Hotmail or Gmail address will work fine, but you will need to be able to access it. Don’t choose an account you have lost access to.
- Whatever route you take, you now need to choose a password for your Apple ID. This may be stating the obvious, but do not use the same password as the one used to log into the email address account you used.
You can get a new iCloud email address, if you want to keep your Apple stuff completely separate
iCloud is the name for Apple’s “cloud” services, the databanks on which Apple stores your emails, any photos you choose to upload and so on. If you choose do to this you’ll also need to input your phone number. This gives Apple another way to verify you identity if, for example, you forget your password. Apple will then send a code to your phone that you’ll type into your iPad — this is effectively to make sure you didn’t get your phone number wrong.
Step 11: Make This Your New iPad
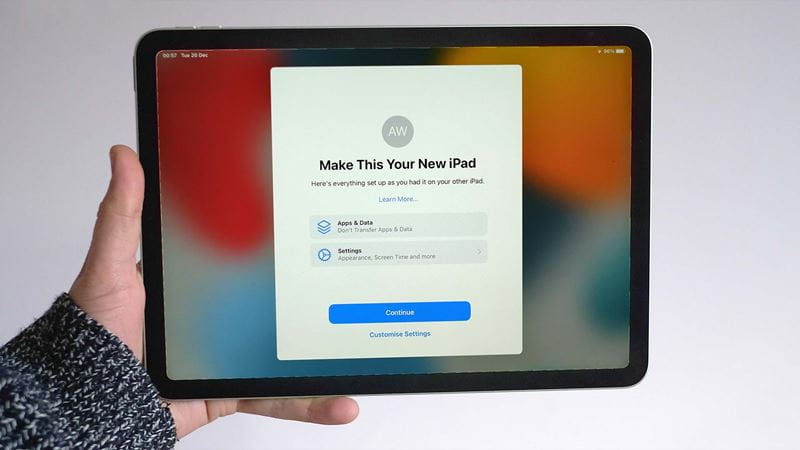
We are almost there. You should now see a “Make This Your New iPad” screen. Part of this simply acts as a summary of choices you have already made, such as the decision not to transfer data over from an existing iPad.
But if you tap Customise Settings there are a few more bits to check out. We recommend enabling Location services, for the best tablet experience. And in the Appearance page you can choose whether to make the default colour of the interface — the background, if you will — white or black.
Apple calls the two looks Light and Dark. Light is the classic version and we recommend starting off with that. You can switch between them later in the iPad’s Settings menu.
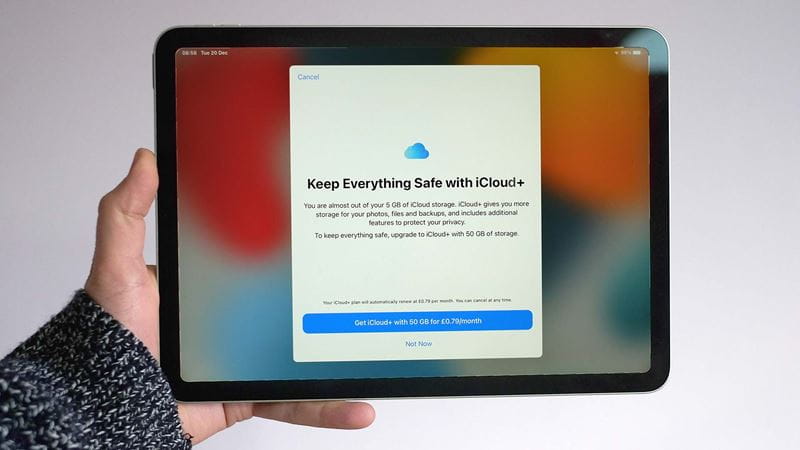
Step 12: Apple iCloud+
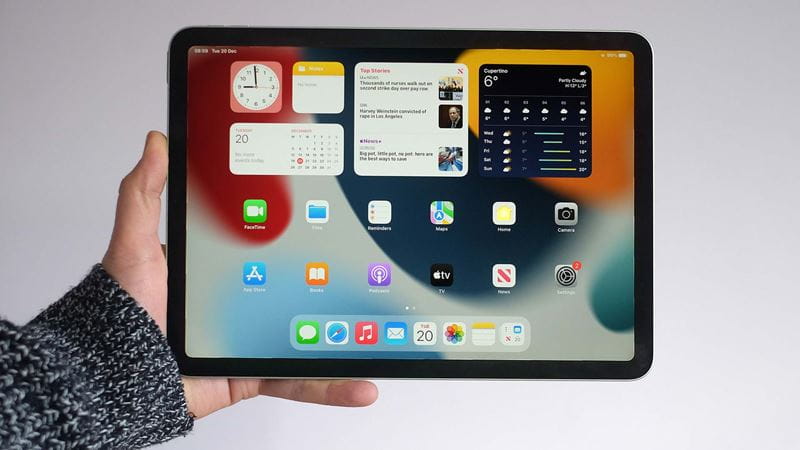
Step 13: You're all set up
First iPad, but have an Apple ID
Setting up your iPad when you already have an Apple ID
- If you already have an Apple ID, the process is the same up to step 10 above. However, instead of creating an Apple ID, just use the login details you already use on, for example, your iPhone.
- Know your password? Once you input these details, Apple will typically ping another of your devices. In our case this was a MacBook Air. The laptop told us there had been an attempt to login, and asked us to confirm this was legit. You’ll then be given a passcode to enter on your iPad.
- After this point you can continue with the method above at step 11.
Previous iPad owner
How to set up your new iPad
If you're upgrading your old iPad to a newer model, this section tells you how to set up a new iPad from an old iPad.
- Already own an iPad or iPhone? Follow the first three steps in our initial tutorial. You’ll now see a screen that asks you to bring the iPhone or iPad you own close to your new iPad.
- Make sure your older iPhone/iPad is upgraded to at least iOS 11, and has its Bluetooth connection turned on. To do this swipe down from the very top-right of the home screen. This should bring up a control panel pane that includes a Bluetooth control. It looks like an angular “B” character with some added lines sticking out of its back. It should look as though it has been selected. It not, give it a quick tap.
- When your new iPhone recognises your old iPad or iPhone, a prompt will appear on that device’s screen.
- You’ll be asked to scan a swirling ball on your new iPad screen using the other device’s camera. Just point the rear camera at your new iPad’s screen.
- If the camera recognises that without a hitch, you’ll be taken to a page that lets you choose how to transfer data over from your old iPad.
- Here you want to select either Restore from iCloud Backup or Transfer Directly from iPad. Or, if you want to start from fresh and just wanted to avoid plugging in your iCloud info, tap Don’t Transfer Apps & Data. You’re now at step 11 in our initial tutorial.
All set up? Try this
Now your iPad is set up, there's a wealth of things you can do with it. We can help get you started with these three ideas.
- How to get WhatsApp on your iPad
- Enhance your iPad experience with these 6 essential iPad accessories
Homes
The ultimate guide to Saga Puzzles, full of technical tips, tricks and hints.


Anne Robinson on what to say when you read a friend's book and it's terrible.

Whether you have the same first word or change it up daily, your puzzle-solving technique is a ‘personality test in disguise’.